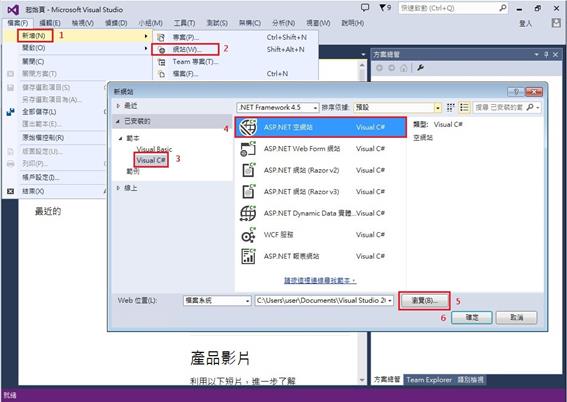
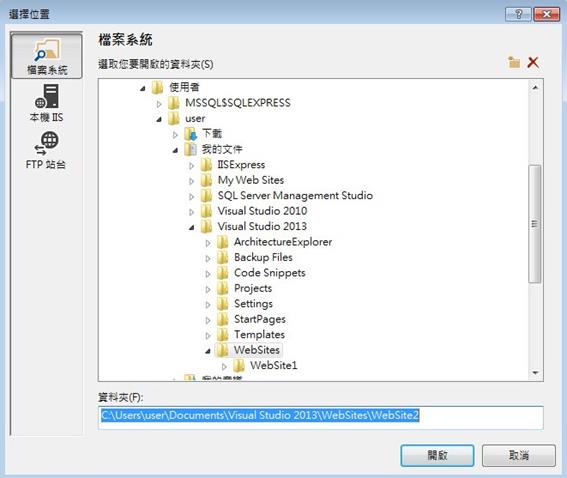
1.新增網站
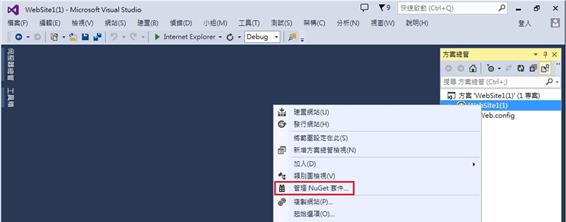
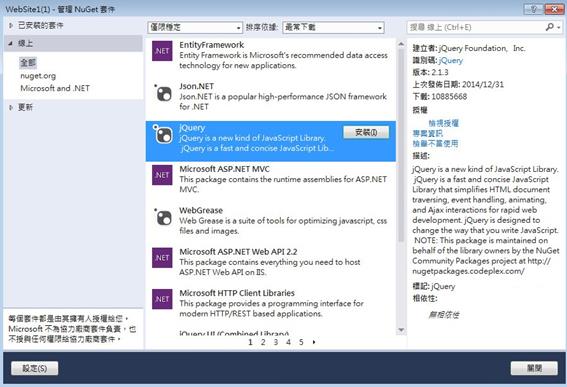
2.使用NuGet安裝專案內的套件
http://blogs.msdn.com/b/msdntaiwan/archive/2013/09/10/visual-studio-gallery-and-nuget.aspx
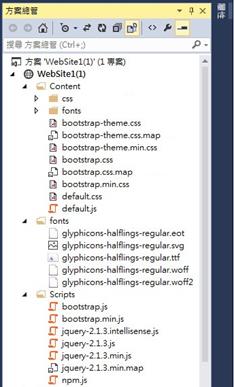
安裝Bootstrap 、 jQuery與font-awesome。安裝完成之後,Visual Studio 2013會在網站中加入三個資料夾:Content、fonts、Scripts。
Content資料夾中包含Bootstrap內建的樣式,以及預設的佈景主題CSS檔案。Fonts資料夾則存放適用於各種不同瀏覽器的字型檔案,內含Bootstrap內建的圖示。Scripts資料夾中則包含Bootstrap程式庫以及相依的jQuery程式庫,請參考下圖所示:
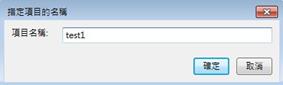
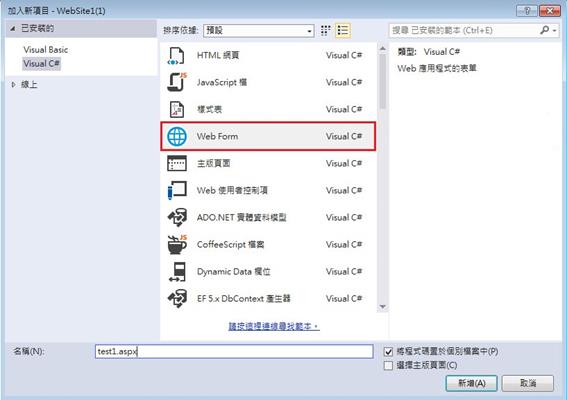
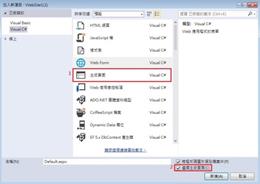
3.新增ASP.NET Web Forms網頁 : test1.aspx
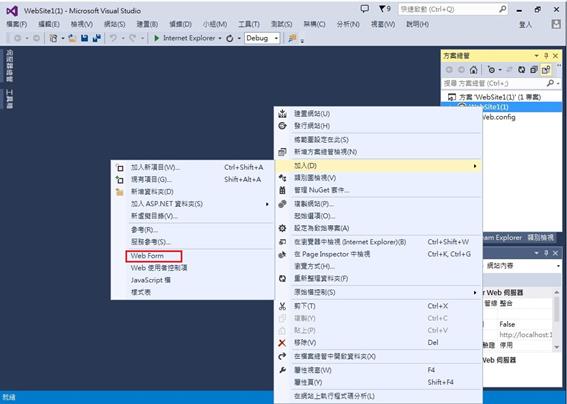
或按加入新項目,新增其他類型檔案
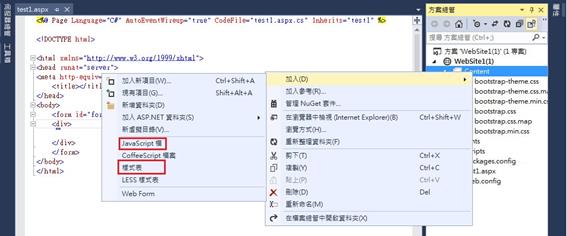
4.在Content加入自訂樣式表default.css,與javascript檔案default.js
5.引用bootstrap、font-awesome以及jQuery程式庫,在<head>標籤中設定viewport以及引用bootstrap、font-awesome及自訂的Custom.css 樣式,在</body>前引用jQuery,程式庫版本是否相同需與方案總管的檔名對照加以檢查,可以利用拖曳的方式將檔案加入原始檔中。將以下程式碼加入至.aspx原始檔中試試,原始檔中的第一行不可以刪除哦。(01-05.txt)
<!DOCTYPE html>
<html xmlns="http://www.w3.org/1999/xhtml">
<head runat="server">
<meta http-equiv="Content-Type" content="text/html; charset=utf-8″ />
<title></title>
<meta name="viewport" content="width=device-width, initial-scale=1.0″ />
<meta charset="utf-8″ />
<link href="~/Content/bootstrap.min.css" rel="stylesheet" />
<link href="~/Content/css/font-awesome.min.css" rel="stylesheet" />
<link href="~/Content/default.css" rel="stylesheet" />
</head>
<body>
<form id="form1″ runat="server">
<!–內容–>
<div class="jumbotron">
<div class="container">
<h1>Hello, world!</h1>
<p> This is a template for a simple marketing or informational website. It includes a large callout called a jumbotron and three supporting pieces of content. Use it as a starting point to create something more unique.
</p>
<a class="btn btn-primary btn-lg" href="#" role="button">Learn more »</a>
</div>
</div>
<!–end 內容–>
</form>
<script src="Scripts/jquery-2.1.3.min.js"></script>
<script src="Scripts/bootstrap.min.js"></script>
<script src="Scripts/default.js"></script>
</body>
</html>
程式頁太亂、不整齊怎麼辦,按一下格式化整化文件或Ctrl+K,Ctrl+D

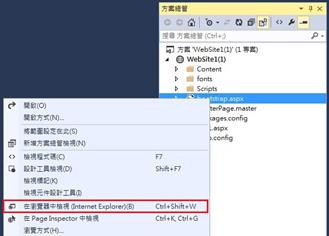
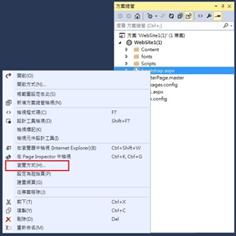
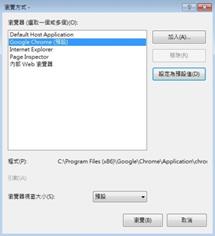
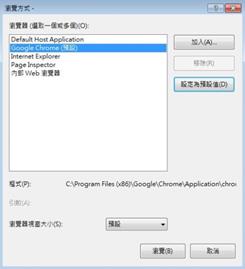
7.將Chrome設為預設的檢視瀏覽器:從方案總管的網站中,按右鍵 / 瀏覽方式 將該瀏覽器設為預設值即可
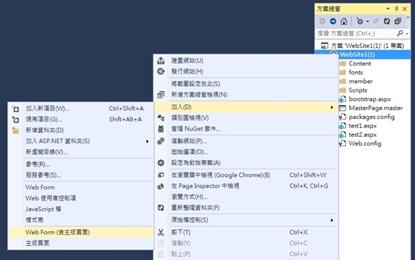
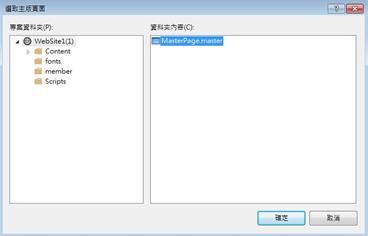
8.新增主版畫面
在 [方案總管] 中,以滑鼠右鍵按一下網站名稱,然後按一下 加入 / 加入新頁目。

參考網頁
ASP.NET 主版頁面概觀
https://msdn.microsoft.com/zh-tw/library/wtxbf3hh(v=vs.100).aspx
逐步解說:在 Visual Web Developer 中建立和使用 ASP.NET 主版頁面
https://msdn.microsoft.com/zh-tw/library/ehszf8ax(v=vs.100).aspx
主版頁面
http://dns2.asia.edu.tw/~rikki/mwt103/ch08rev.pdf
9.在主版頁面中加入html碼(01-09.txt),主版頁面無法在瀏覽中檢視,需另外新增套用此主版頁面的web form網頁才能呈現
<!DOCTYPE html>
<html xmlns="http://www.w3.org/1999/xhtml">
<head runat="server">
<meta http-equiv="Content-Type" content="text/html; charset=utf-8″ />
<title></title>
<meta http-equiv="Content-Type" content="text/html; charset=utf-8″ />
<meta name="viewport" content="width=device-width, initial-scale=1.0″ />
<link href="~/Content/bootstrap.min.css" rel="stylesheet" />
<link href="~/Content/css/font-awesome.min.css" rel="stylesheet" />
<link href="~/Content/default.css" rel="stylesheet" />
<asp:ContentPlaceHolder ID="head" runat="server">
</asp:ContentPlaceHolder>
</head>
<body>
<!–header–>
<div class="navbar navbar-inverse navbar-static-top">
<!–<div class="navbar navbar-inverse navbar-fixed-top">–>
<div class="container">
<a href="#" class="navbar-brand">新北留言板</a>
<!– 放在縮合組合的上方 collapse:縮合,Dropdown下拉,#collapseMenu : id selector –>
<button class="navbar-toggle" data-toggle="collapse" data-target="#collapseMenu">
<span class="icon-bar"></span>
<span class="icon-bar"></span>
<span class="icon-bar"></span>
</button>
<!– 縮合用,當畫面太小時會呈現–>
<div class="collapse navbar-collapse" id="collapseMenu">
<!– 左邊 menu –>
<ul class="nav navbar-nav navbar-left" id="leftmenu">
<li>
<a href="#Home"><span class="glyphicon glyphicon-home “></span>
<!– icon fa-spin for rotate–>
首頁</a>
</li>
<li class="active">
<a href="#blog">
<span class="fa fa-coffee fa-spin"></span>
<!– icon –>
功能區
</a>
</li>
<li class="dropdown">
<!– menu item –>
<a href="#share" class="dropdown-toggle" data-toggle="dropdown">
<!– menu item 中的 button –>
<span class="fa fa-group"></span>
<!– 群組 icon –>
群組 <b class="caret"></b>
<!– 提示可下拉的倒三角形 –>
</a>
<ul class="dropdown-menu">
<li class="active"><a href="#grp/a">群組A</a></li>
<li><a href="#grp/b">群組B</a></li>
<li class="divider"></li>
<li><a href="#grp/add">建立群組</a></li>
</ul>
</li>
</ul>
<!– 右邊 menu –>
<ul class="nav navbar-nav navbar-right" id="rightmenu">
<li class="dropdown">
<!– menu item –>
<a href="#share" class="dropdown-toggle" data-toggle="dropdown">
<!– menu item 中的 button –>
<span class="fa fa-group"></span>
<!– 群組 icon –>
登入 <b class="caret"></b>
<!– 提示可下拉的倒三角形 –>
</a>
<ul class="dropdown-menu">
<li>
<a href="#grp/a">
<span class="fa fa-google-plus-square" style="font-size: 20px; color: red;"></span>
Google
</a>
</li>
<li>
<a href="#grp/a">
<span class="fa fa-facebook-square" style="font-size: 20px; color: blue;"></span>
Facebook
</a>
</li>
</ul>
</li>
</ul>
</div>
</div>
</div>
<!–end header–>
<form id="form1″ runat="server">
<div>
<asp:ContentPlaceHolder ID="ContentPlaceHolder1″ runat="server">
</asp:ContentPlaceHolder>
</div>
</form>
<!–footer–>
<div class="navbar navbar-default">
<div class="container “>
<p class="navbar-text">ENCTC © 2015</p>
</div>
</div>
<!–end footer–>
<script src="~/Scripts/jquery-2.1.3.min.js"></script>
<script src="Scripts/bootstrap.min.js"></script>
<script src="Scripts/default.js"></script>
</body>
</html>
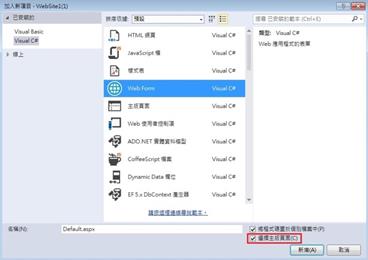
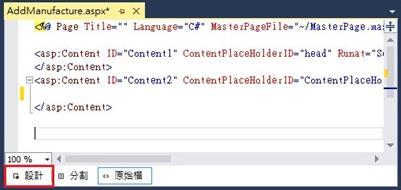
10.加入含主版頁的WebForm:在方案的網站上 右鍵 /加入 / 加入新項目 或 WebForm(含主版畫面),test2.aspx
在<asp:Content ID="Content2″ ContentPlaceHolderID="ContentPlaceHolder1″ Runat="Server">與
</asp:Content>兩行中間加入些bootstrap語法,再瀏覽看是否是正常(01-10-1.txt)
範例碼:
<div class="jumbotron">
<div class="container">
<h1>Hello, master page!</h1>
<p>This is a template for a simple marketing or informational website. It includes a large callout called a jumbotron and three supporting pieces of content. Use it as a starting point to create something more unique.
</p>
<a class="btn btn-primary btn-lg" href="#" role="button">Learn more »</a>
</div>
</div>
加入含主版頁的WebForm : default.aspx , 將上面的html加入所新增的WebForm中,在網頁上檢視一下(01-10-2.txt)
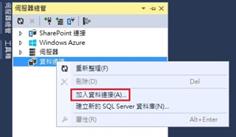
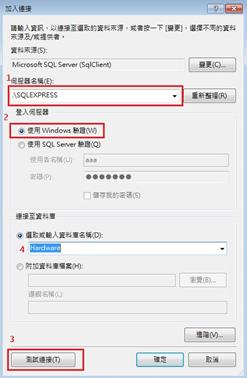
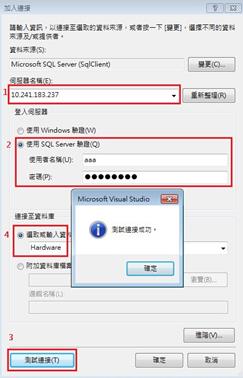
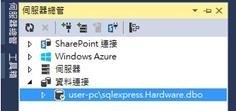
11.加入資料連接
12.LINQ:Language-Integrated Query (LINQ) 是 Visual Studio 2008 引進的一組功能,可將強大的查詢功能擴充至 C# 和 Visual Basic 的語言語法。
LINQ 推出標準且容易學習的資料查詢與更新模式,而且這項技術可擴充為支援幾乎所有類型的資料存放區。 Visual Studio 包括 LINQ 提供者組件,可讓您使用 LINQ 搭配 .NET Framework 集合、SQL Server 資料庫、ADO.NET 資料集和 XML 文件。
Language-Integrated Query (LINQ) 是 Visual Studio 2008 和 .NET Framework 3.5 版中引進的創新技術,用來填補物件與資料之間的缺口。
傳統上,資料查詢是以簡單的字串表示,既不會在編譯時期進行型別檢查,也不支援 IntelliSense。 此外,您還必須針對每種資料來源學習不同的查詢語言:SQL 資料庫、XML 文件、各種 Web 服務等等。 LINQ 為物件領域和資料領域間架起了一座橋樑,只要使用語言關鍵字和您熟悉的運算子,就可以針對任何由支援 IEnumerable 或泛型 IEnumerable<T> 介面的物件組成的集合撰寫查詢。
13.開始使用 C# 中的 LINQ :
執行應用程式時,LINQ to SQL 會將物件模型中的 Language-integrated Query 轉譯成 SQL,並將這些查詢傳送至資料庫進行執行。 當資料庫傳回結果時,LINQ to SQL 會將結果轉譯回您可以管理的物件。
15.使用 LINQ to SQL 的一般步驟 :建立物件模型與使用物件模型
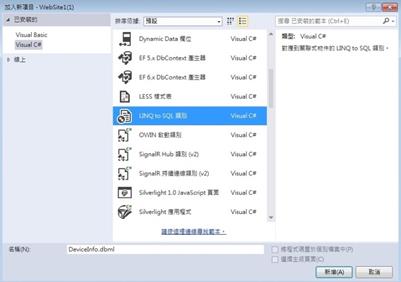
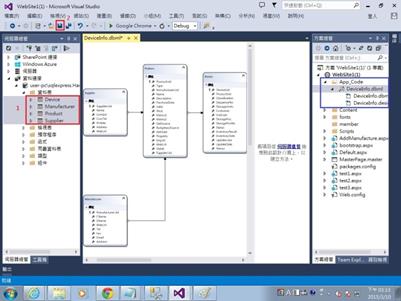
16.建立 LINQ to SQL 類別:使用物件關聯式設計工具 (O/R 設計工具),建立以資料庫中之物件為基礎的 LINQ to SQL [LINQ to SQL] 實體類別和關聯。
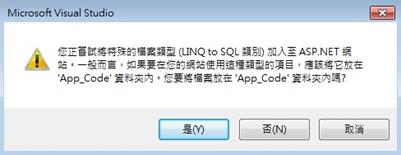
在方案的網站上 右鍵 /加入 / 加入新項目,點選LINQ to SQL 類別,並輸入檔名DeviceInfo.dbml(存檔時會建議你把該檔放案會App_code資料夾)。在打開的版面中將資料表中的四個資料表一起加入,儲存之後,O/R 設計工具會產生具型別的 DataContext 和實體類別。開啟App_code/DeviceInfo.designer.cs 以及 web.config 檢視。資料表中的欄位如有新增或修改,將dbml檔打開,移除全部後,重新拉進所有資料表,儲存即可更新資料類別。

請參考
逐步解說:建立 LINQ to SQL 類別 (O/R 設計工具) , 快快樂樂學LINQ系列
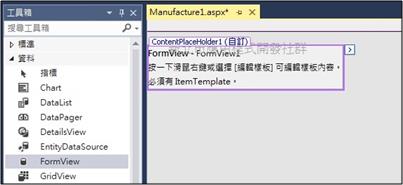
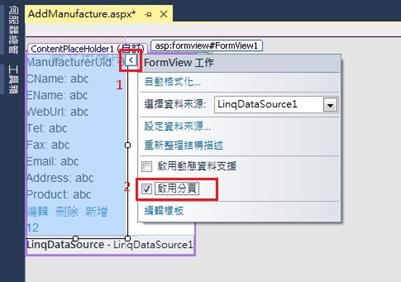
17.使用者介面:使用FormView進行資料表的查詢、新增、修改及刪除。加入含主版頁的WebForm,命名為Manufacture1.aspx,做為廠商資料管理。將左下角檢視狀態切換至設計模式,接著從上角的工具箱中將FormView拉至頁面ContentPlaceHolder1中(出現+時再放開),(如無法插入,可以切回原始檔模式,將FormView拉至ContentPlaceHolder1中亦可,再回到設計模式)
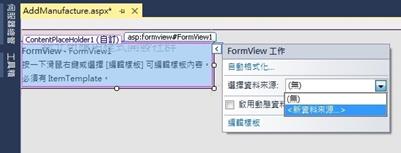
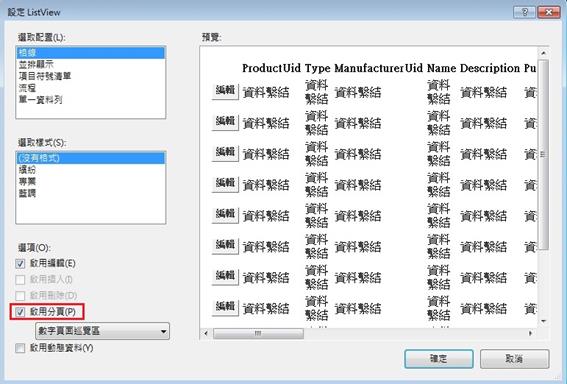
18.以智慧標籤進行資料來源設定:點選右上角的 > 符號顯示智慧標籤進行來源設定與編輯樣本內容,
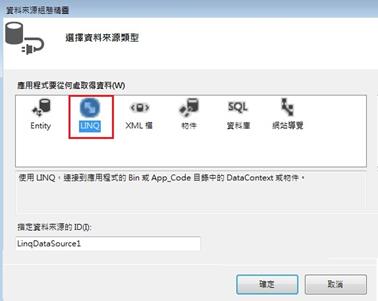
資料來源:新資料來源,類型:LINQ,
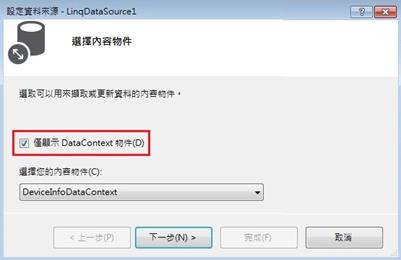
設定資料來源ID,選擇內容物件:DeviceInfoDataContext,由LINQ to SQL 類別所產生的DataContext物件,
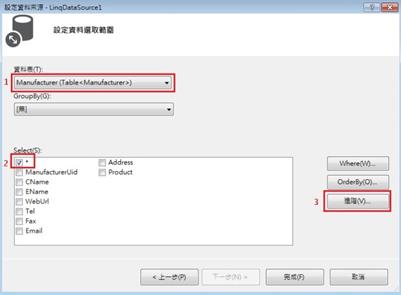
資料表:請選擇對應的資料表Manufacture,* 代表選取所有欄位內容,
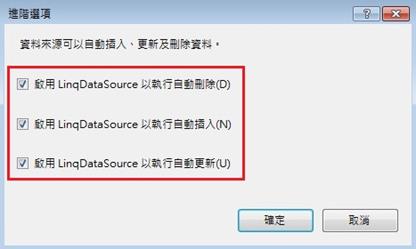
進階:啟用刪除、修改與插入功能
完成後啟用分頁功能。
預覽:進行資料、新增、修改及刪除測試
檢視網頁原始檔,如何與bootstrap結合
19. FormView的屬性 RenderOuterTable="False",加入bootstrap css 美化一下 ,
樣式1、樣式2、樣式3、button,(02-19.txt)
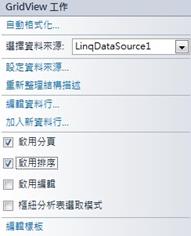
20.使用者介面:使用GridView進行資料表的查詢。:加入含主版頁的WebForm,命名為Gridview_Product1 .aspx,做為資訊產品瀏覽,資料來源中進階不設定,完成之後在瀏覽檢視一下。修改表格標題HeaderText以及移除不必要的欄位並加入CSS 美化頁面,GridView 的 GridLines="none",最後另外加入超連結來顯示相關的資訊設備的財產清單。
在<Columns>下加入:
<asp:HyperLinkField DataTextField="Description" DataNavigateUrlFields="ProductUid" HeaderText="型號規格" DataNavigateUrlFormatString="device1.aspx?uid={0}" />
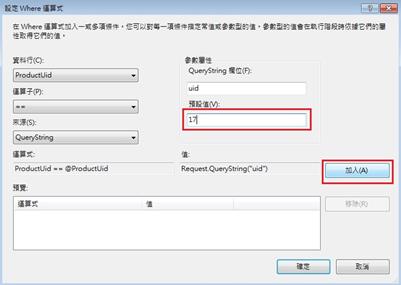
21.GridView:加入含主版頁的WebForm,命名為Device1.aspx做為財產清單瀏覽。在設定資料來源的設定資料選取範圍中,在Where中加入選取資料的條件,order中加入排序條件,進階選項不設定,完成之後在瀏覽檢視一下。修改表格標題HeaderText以及移除不必要的欄位並加入CSS 美化頁面,GridView 的 GridLines="none"。


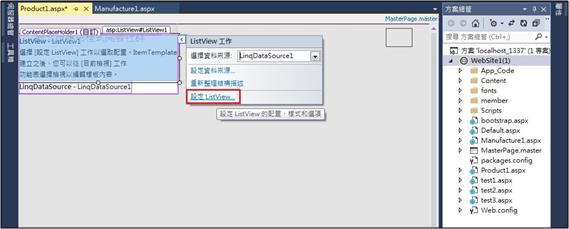
22.ListView:加入含主版頁的WebForm,命名為Listview_Manufacture1.aspx。將左下角檢視狀態切換至設計模式,接著從上角的工具箱中將FormView拉至頁面ContentPlaceHolder1中(出現+時再放開),(如無法插入,可以切回原始檔模式,將FormView拉至ContentPlaceHolder1中亦可,再回到設計模式),接著進行資料來源及外觀設定,檢視原始碼加入bootstrap css 美化一下 ,樣式1。
ListView 基本概念
ListView 是一種以樣板導向的控制項,這表示它預設並不會呈現任何東西 — 您必須以樣板的形式,完整指定希望它呈現的 HTML。與大多數樣板控制項一樣,ItemTemplate 也將成為您大部分工作的重點,因為這就是您放置 HTML 內容的位置,且會針對繫結資料集的每一個資料列重覆執行。
ListView 中引進了LayoutTemplate新功能。LayoutTemplate 就是可在最上層定義的 HTML,這會輸出成控制項呈現資訊的一部分。例如,如果您希望 ListView 會呈現出資料表,就可以在 LayoutTemplate 中納入最上層的 <table>,也可以納入 <thead> 項目,然後由 ItemTemplate 呈現資料列和儲存格。
LayoutTemplate 與 ItemTemplate 之間的關聯,是利用 LayoutTemplate 中伺服器端的單一控制項,並將 ID 設定為 itemPlaceholder 來達成的 (您可以使用 ListView 的 ItemPlaceholderID 屬性,來變更 ID 字串的預設值)。在第一個範例中,我在想要加入 ItemTemplate 內容的樣板位置,使用了放置 PlaceHolder 控制項之執行個體的技巧。請注意,雖然可做為預留位置的控制項型別並沒有限制,但是它必須支援子控制項 — ID 才是最重要的。