
為了方便管理伺服器,通常伺服器端會啟用SSH的服務,遇到要上傳檔案到伺服器,如果沒安裝FTP服務,WinSCP就可以派上用場了
登入 
上傳與下載
在CentOS7虛擬機安裝VMware tools , 掛接光碟

在虛擬機新增資料夾,掛接光碟
mkdir /mnt/cdrom
mount /dev/cdrom /mnt/cdrom

解壓縮 VMwareTools 至 /tmp 下 -C 要大寫
tar xzvf /mnt/cdrom/VMwareTools-10.0.6-3560309.tar.gz –C /temp/
cd /tmp/vmware-tools-distrib

安裝 ./vmware-install

上網找了一下安裝方法,發現應該是少了某些套件,執行下以下指令
yum -y install perl gcc make kernel-headers kernel-devel
再次執行 ./vmware-install , 輸入 yes開始安裝,一連串的交互問答,按enter,以預設值繼續

完成

reboot

安裝完CentOS 7 後要看自己的IP,打上慣用的指令,ifconfig 竟然出現指不到指令,奇了

ls /sbin | grep ifconfig 沒找到該指令,那就是沒安裝囉

yum search ifconfig

安裝,yum install net-tools.x86_64

ifconfig

(1)在Youtube 找到要上傳的影片,複製網頁網址,例如
(2)登入clipbucket,點選上傳影片 Upload Video
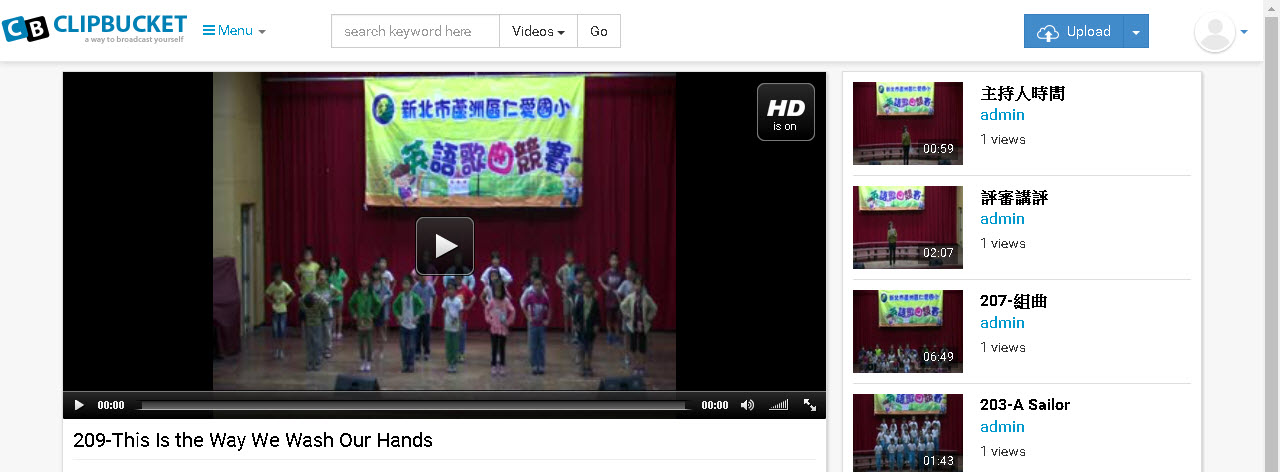
(3)點選遠端上傳,貼上YouTube網址,按下 從YouTube抓取,順利的話,即可得到影片的相關資訊,並完成影片上傳,唯更新影片資訊似乎沒有作用,按下Submit now可以繼續上傳下一影片

(4)YouTube如無法抓取相關資訊,通常是因為上傳時未編輯影片基本資訊所造成,若是自己上傳的影片,登入YouTube後編輯影片資訊更新,通常即可讓ClipBucket抓到相關資訊,完成上傳,在clipbucket中編輯影片資訊時可以發現,影片內容只是嵌入碼,影片來源還是在YouTube,但有個好處是少了YouTube的廣告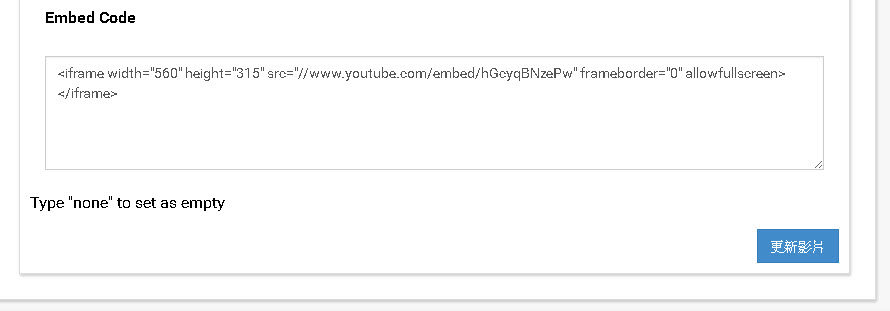
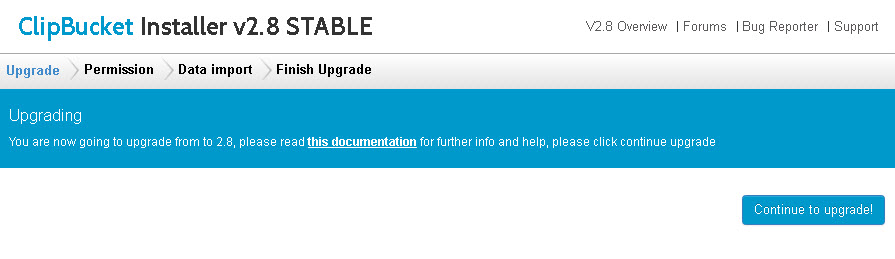
收到 ClipBucket 2.8 的郵件已有一段時日,從2.6版安裝完成至今也有一段時日,突然心血來潮想把它升級,看看有沒有多出新功能,從官網http://clip-bucket.com/的畫面看來應該有支援RWD,可以讓各種行動裝置使用,還滿合乎現在的驅勢,就來給他升級吧

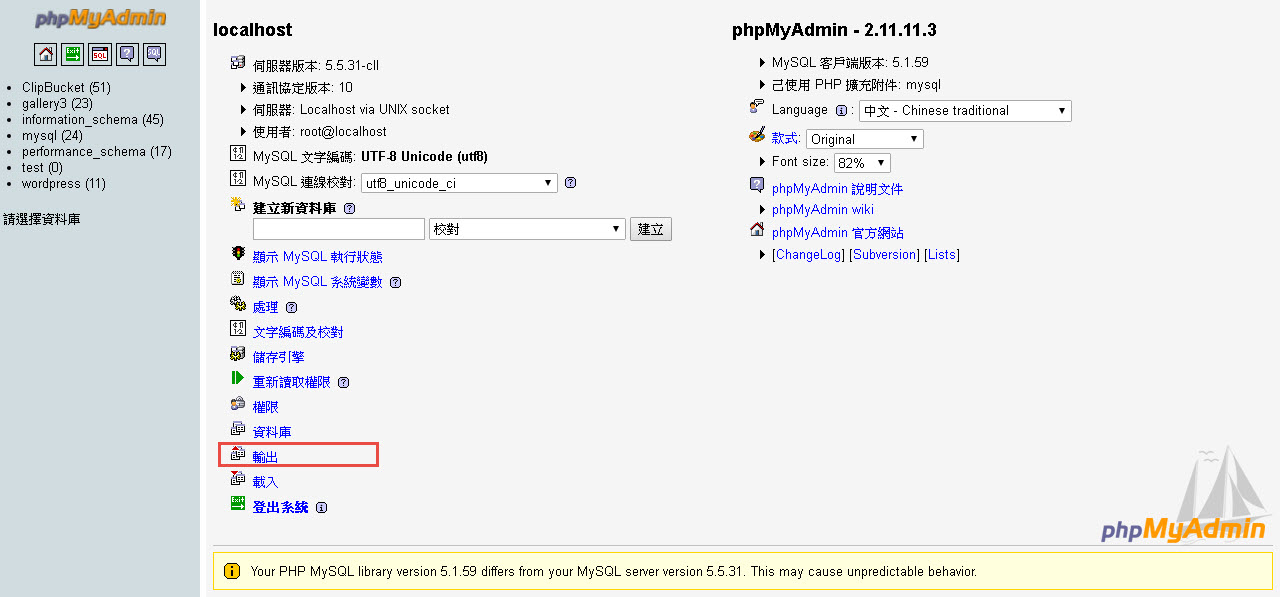 選擇clipbucket資料庫備份
 下載.sql檔
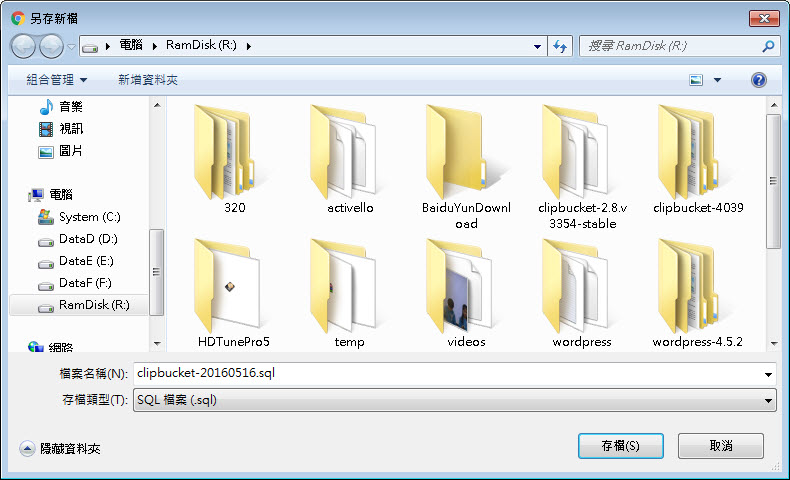
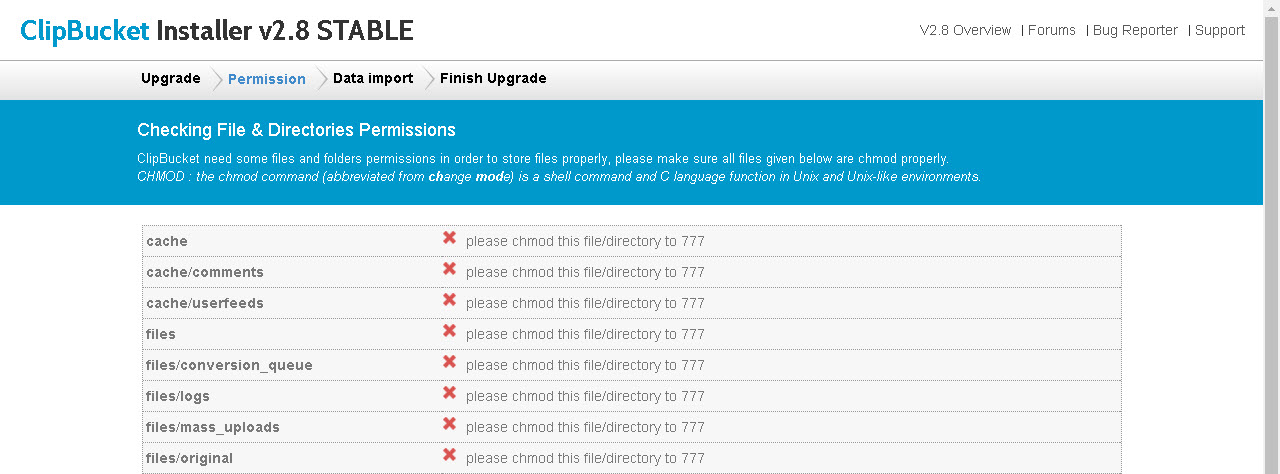 更改權限後,重新整理如下圖
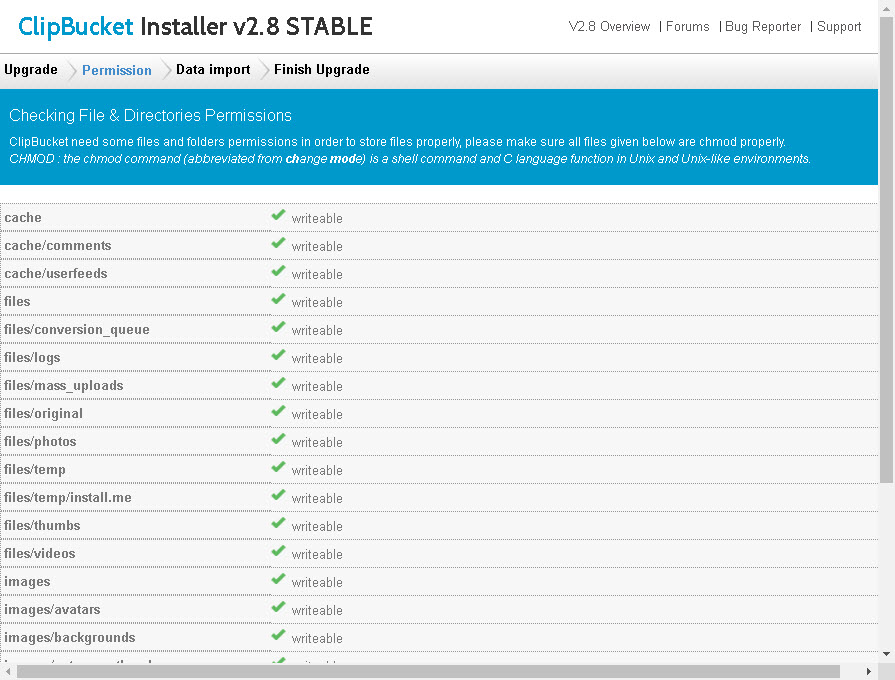 升級完成,continue to clipbucket v2 回首頁看看
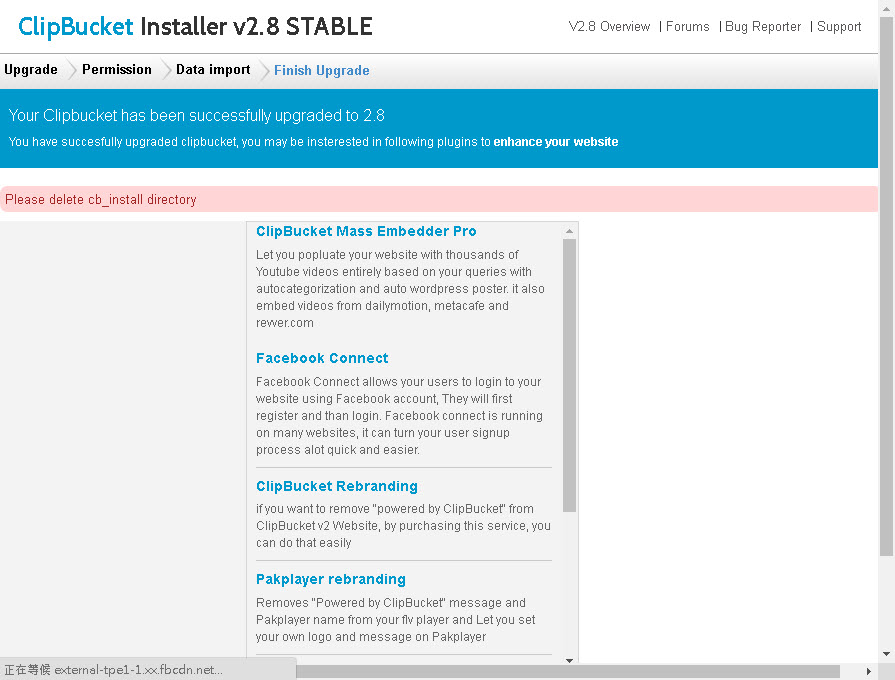 除了圖片不見、影片不見,中文字顯示也不正常
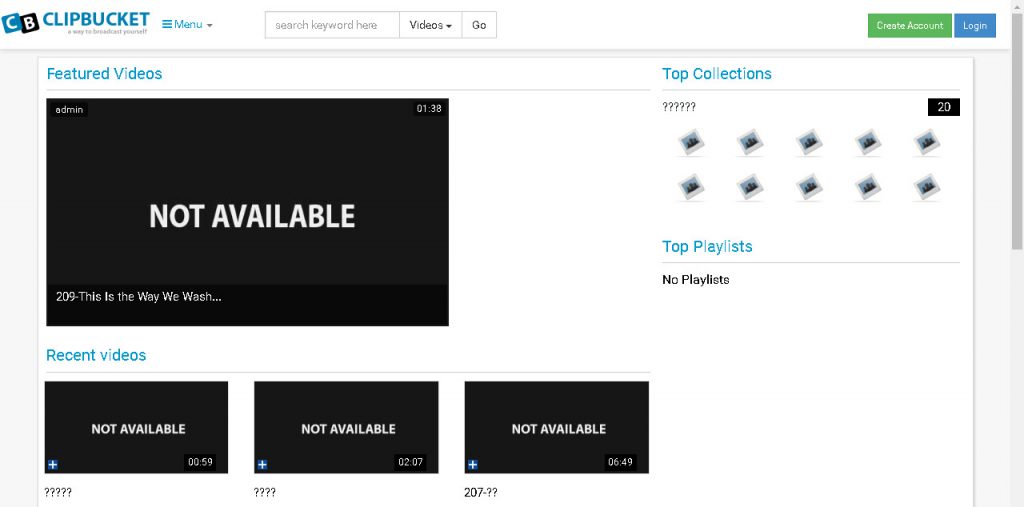 播放影片也出現如下錯誤
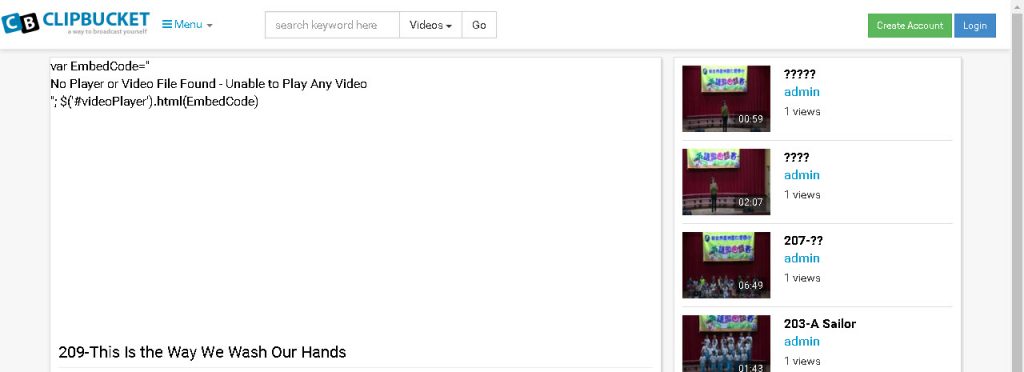 處理如下
處理如下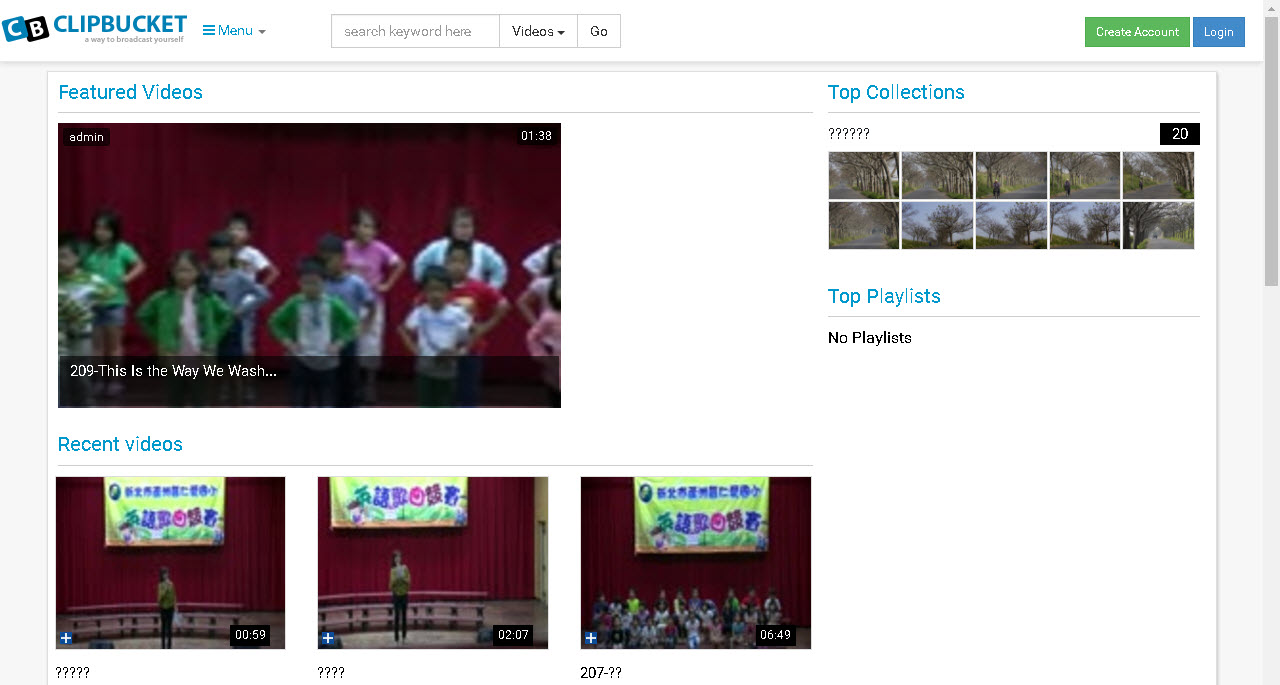 (2)解決 PHP 連 MySQL 亂碼的問題,參考網頁
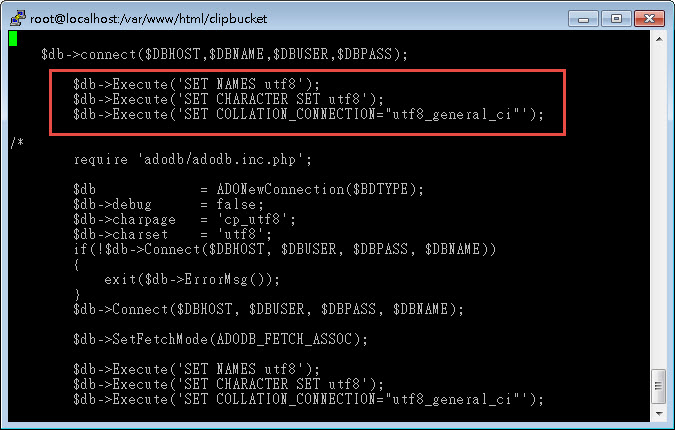 重新整理後,中文已正常
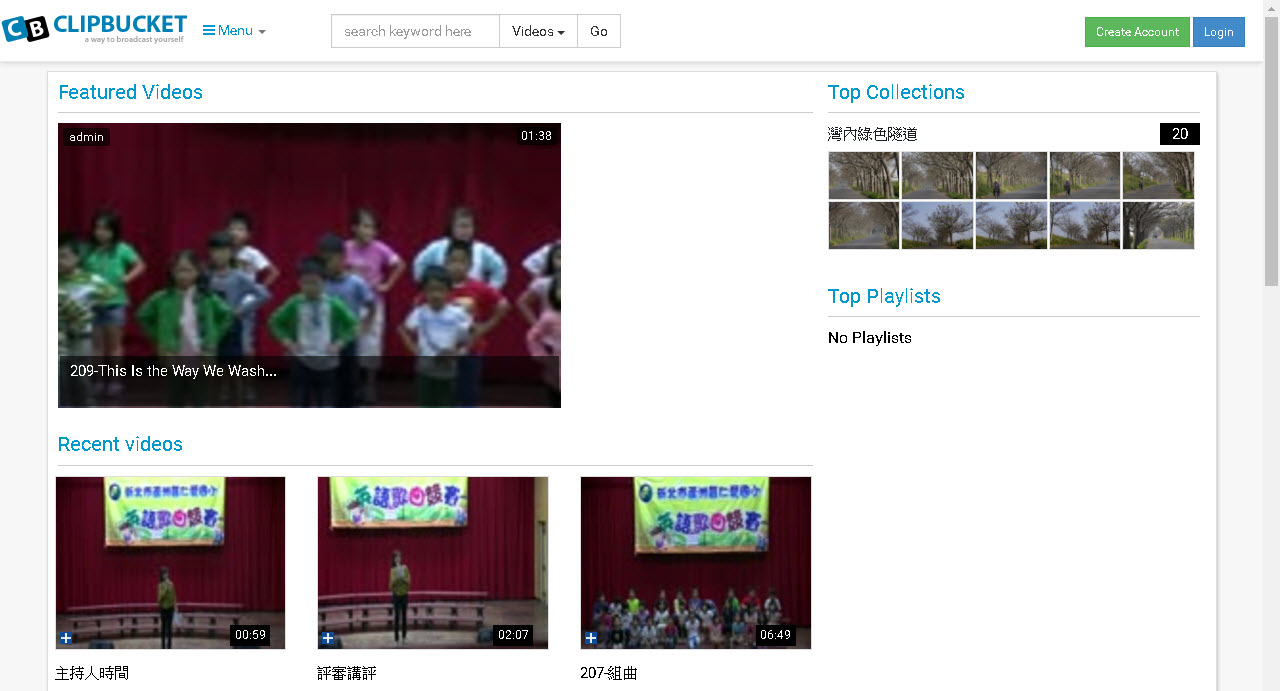 (3)播放影片出現問題的處理,以管理者登入
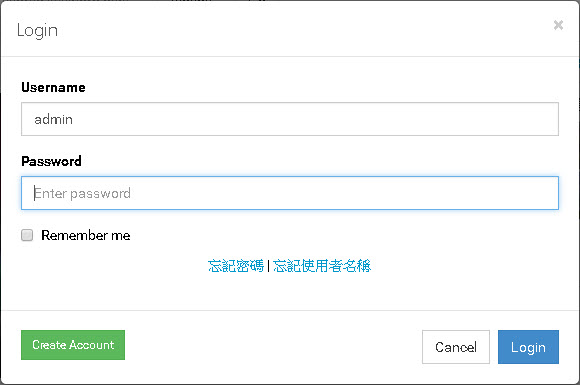 從右上角的下拉選單Admin area進入管理介面
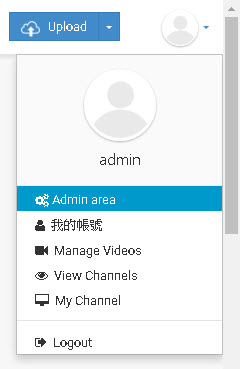

 回到Admin area管理頁面,黃色的字You must update “Server Configurations",點選 details,請根據提示更新php的設定值
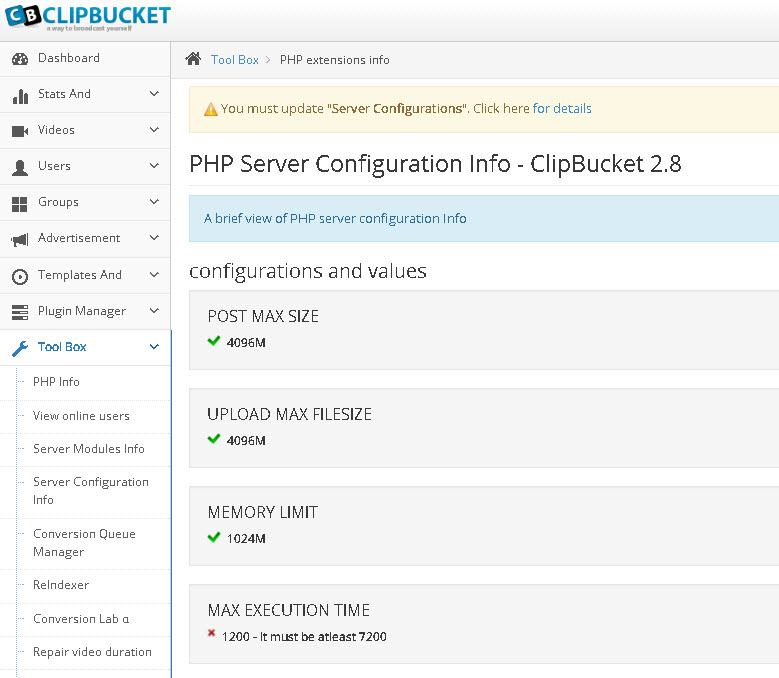 # vi /etc/php.ini支援拖曳的方式多檔上傳,或點選Select Videos上傳檔案,上傳一個小檔案來看看轉檔是否成功
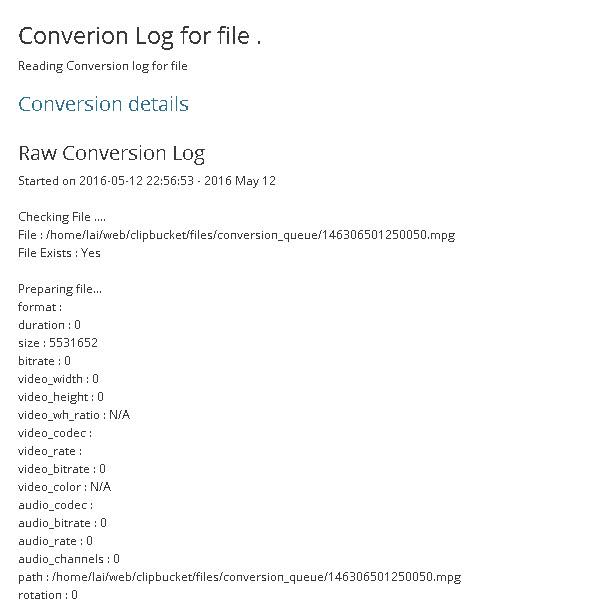
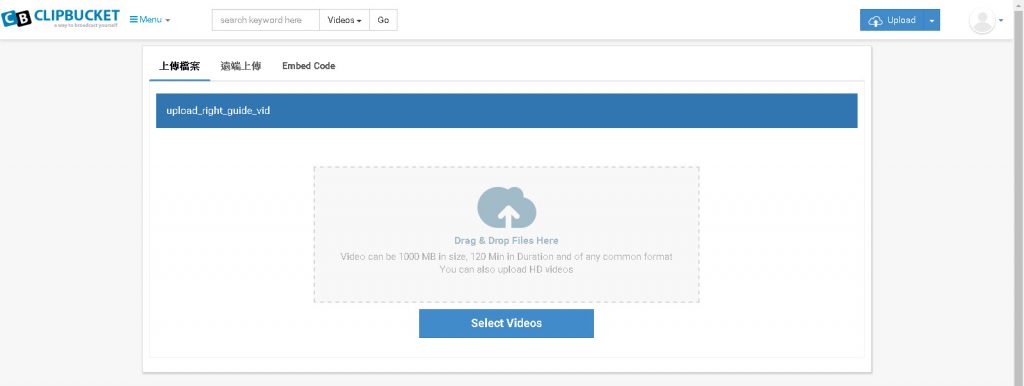 點選右上角 Admin area切換至管理模式,點選 Videos 的 Video mamanger,可以發現剛剛剛上傳的兩個檔案都沒成功
 ffmpeg output
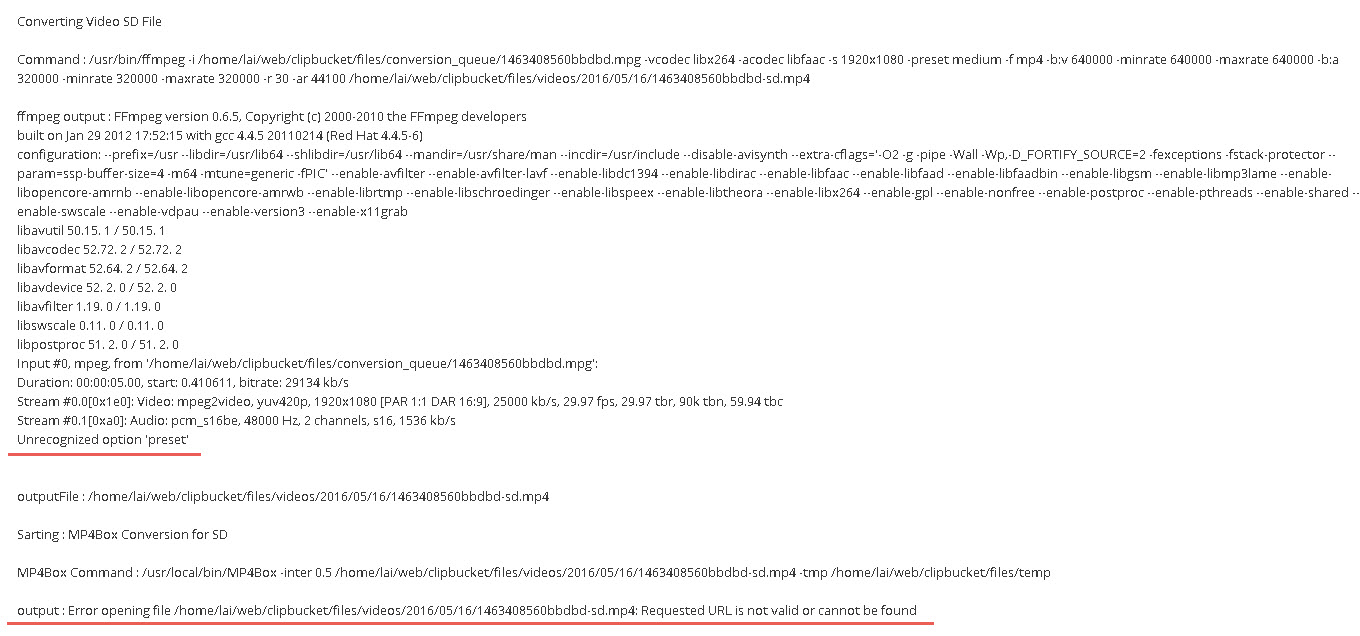

 解決方式:參考網頁
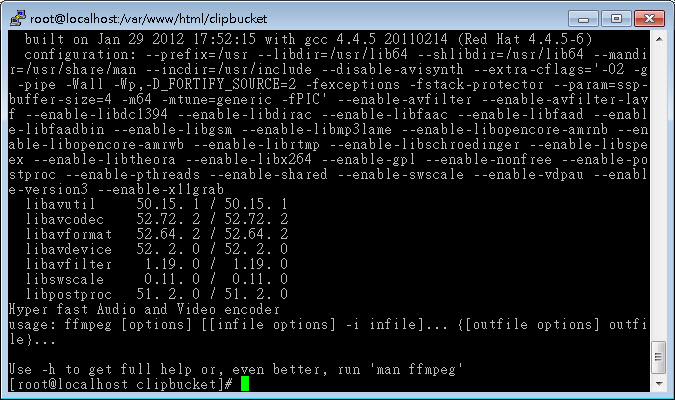
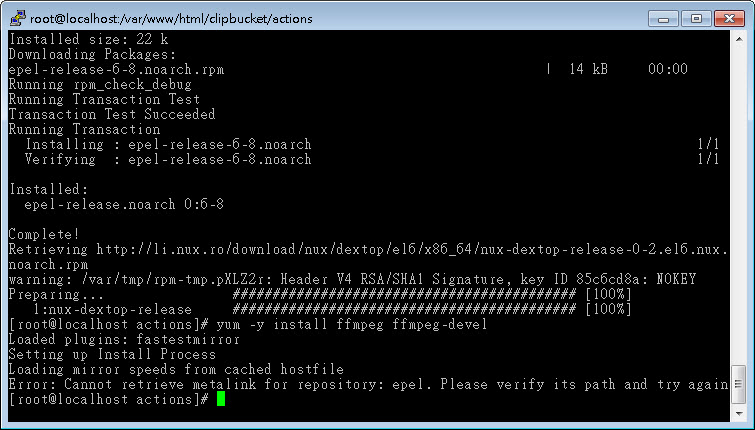 解決方法:請參考 在Centos 5.x或6.x上安装RHEL EPEL Repo ,或先移除ffmpeg,再重裝
 ffmpeg 升級完成,重新上傳影片轉檔試試
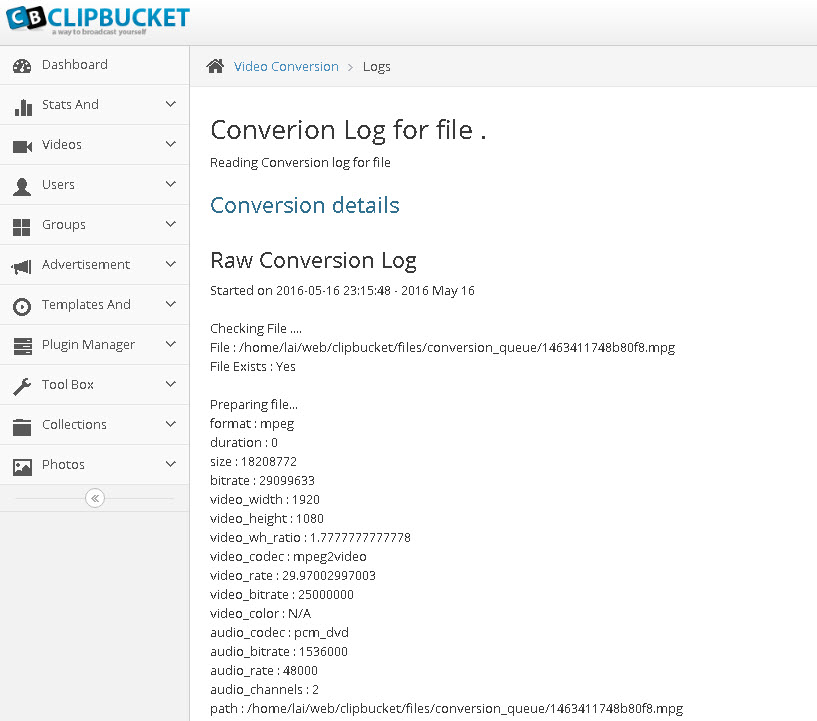


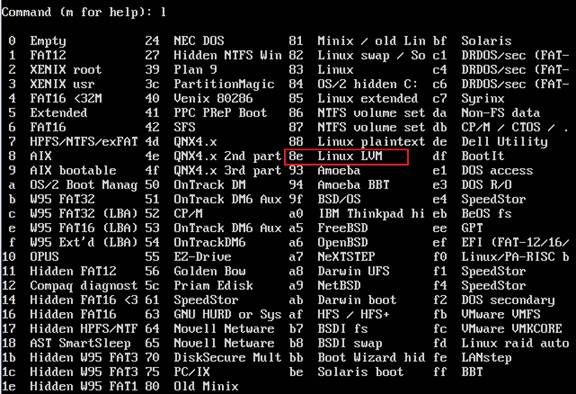
在fdisk中查出LVM的type是8e
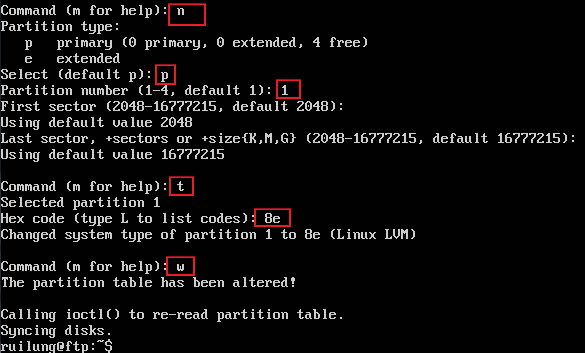
以 fdisk /dev/sdb 針對sdb 新增Partition , 分割表類型8e , 接受LVM管理
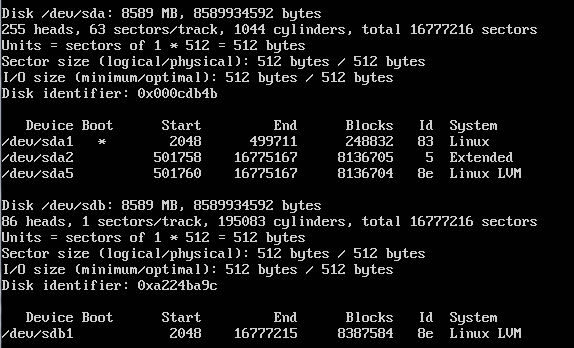
fdisk -l,看到剛新增的partition叫/dev/sdb1
LV的是由VG(Volume Group)劃出來的,而VG是由PV(Physical Volum)組合而成的,所以要擴充LV,就要將分割好的partition轉成PV,以做後續的使用,指令如下
pvcreate /dev/sdb1,由上圖看到新增的partition是/dev/sdb1,將它轉換成PV
![]()
pvscan 一下
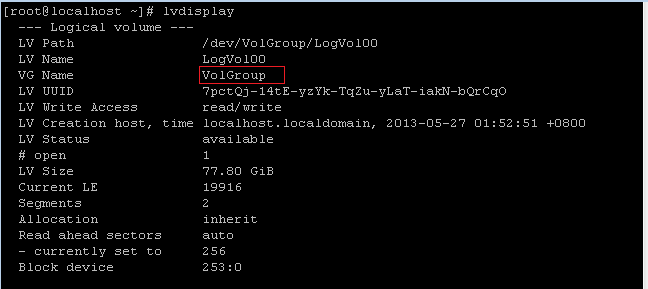
lvdisplay 一下 , 將LVpath 與 VGname 記錄下來
vgextend VolGroup /dev/sdb1,PV做好後,將PV加入VG,做VG的擴充,VG的名字由上圖得知
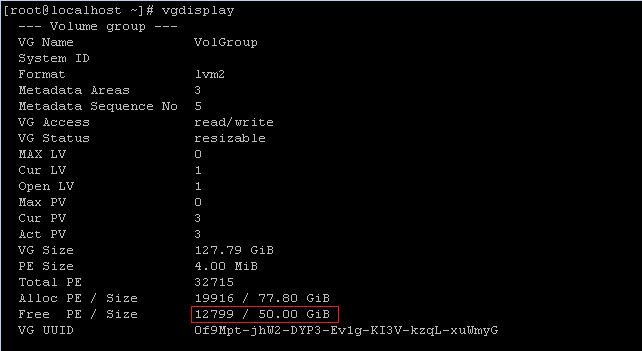
vgdisplay
可以看出不但整體 VG 變大了!而且剩餘的 PE 共有 12799 個,容量則為 50G
接下來,放大 LV 吧!利用 lvresize 的功能來增加!
lvresize -l +12799 /dev/VolGroup/LogVol00
df指令可以看到實際大小沒改變,
將擴充後的LV 的容量擴充到整個 filesystem 吧!
resize2fs /dev/VolGroup/LogVol00

在CentOS7 下執行卻出現了以下畫面
resize2fs: Bad magic number in super-block while trying to open
上網查了一下,CentOS 7 要將 resize2fs 改成 xfs_growfs
為什麼 cp 會一直出現是不是要覆寫的確認訊息呢?
明明 cp –help 裡面也提到 -f 的參數使用方式:
-f, –force if an existing destination file cannot be opened, remove it and try again。
可是即使加上了這個參數仍舊無法直接覆蓋 @@
原來 cp 預設會被設定成別名:alias cp=’cp -i’,
也就是使用了參數 cp 時都會自動改用 cp -i,-i 是 interactive 互動的縮寫,
所以不管你說了什麼,他就是要來跟我們「互動」一下 orz。
解決方法很簡單,避開別名 cp,直接使用 /bin/cp 就可以囉
或者用更直接的方式,取消 cp 的別名:
[root@centos demo]# unalias cp
如何打包
tar [-cvfz] [tar ball檔案] [被tar的檔案或目錄]
c create一個tar ball
f 指定tar ball檔名
v verbose,列出過程
z 使用gzip壓縮 tar ball
例 tar -zcvf etc.tar.gz /etc/*
三、如何解出
tar [-xvfz] [tar ball檔案] [被tar的檔案或錄]
x 解出tar ball
f 指定tar ball檔名
v verbose,列出過程
z 使用gzip解壓縮(.gz)
tar -zxvf etc.tar.gz /home/
進行ezgo備份時,在sda1出現以下的誤錯,sda1無法完成備份
錯誤訊息如下圖,大概內容:bitmap free count err, free: 6871416 Partclone fial, please check /var/log/partclone.log

上網查詢後,在備份時,由專家模式,是否修正分割區檔案:勾選 –fsck–src–part 即可完成備份,備份ms的win7沒有出現這個問題,用入門模式一直下一步即可完成。
